 |
| Widget Related Post |
Sudah larut malam saya malas berpanjang lebar berbasa-basi pada postingan kali ini, Widget Related Post Dari nRelate ini cara pasangnya mirip-mirip Widget Related Post dari LinkWithin. Demonya bisa dilihat pada gambar diatas.
Cara pasangnya sebagai berikut, saya copas step by step tanpa menerjemah.
1. Go to https://partners.nrelate.com/ and Create an account if you have not created one yet

2. After signing in , In the Dashboard go to Install > Blogger

3. Enter your Blog address and click the Submit button

4. Now you will be asked where to show the widget , I suggest selecting the Post Only option.

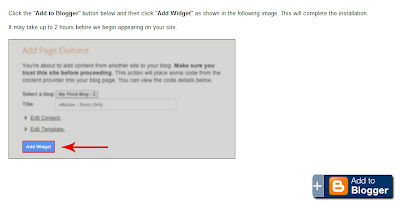
5. Now you will be asked to add the code into your Blog , just click the Add to Blogger button

6. After selecting the correct blog , click the Add Widget button

7. Check your blog to see the widget. Normally it takes around 2 hours for it showup. In case it doesn't show feel free to nrelate via Twitter , they are super responsive.
Some Other Settings
To Remove the nRelate Logo
In the nRelate Dashboard , Go to Manage Settings > Blogger , under the Layout Settings uncheck the box asking to display the nrelate logo and you are good to go.
To change the Display layout
In the Main Settings , select from the drop-down list of Styles. ( Polaroid and Toonbarn are my favorites )
In the Main Settings , select from the drop-down list of Styles. ( Polaroid and Toonbarn are my favorites )
You can fiddle with all the other settings as well if you like . Feel free to ask if you hit a problem .
Sumber : http://www.stylifyyourblog.com

No comments:
Post a Comment